Monday, January 31, 2011

Vegetarian Black Bean Patties.


You could call them burgers, but to me that means beef. However, that doesn’t mean you can’t make a delicious meat free patty that goes great on a bun, or alongside some greens for a healthful fiber-rich meal, without all the fat. To make this work, the beans and mushrooms need to be dry. Adapted from Bush's Beans recipe.


Ingredients:
Two 15 ounce cans black beans, rinsed and drained very well
½ cup flour - ideally whole wheat
¼ cup salsa
¼ - ½  cup breadcrumbs
1 4oz can mushrooms drained and patted dry
2 cloves garlic rough chopped
½ onion rough chopped
2 tsp ground cumin
1 tsp salt


Preparation:
Put onions and garlic in food processor, process until smooth. Remove to fine sieve to drain. Press to drain liquids.


Place beans in food processor; process until almost smooth.


Add flour, breadcrumbs, mushrooms, onion garlic mixture, cumin and salt. Process until well combined. It will look like refried beans.


Form mixture into 4-6 balls and refrigerate at least 1 hour or up to overnight before cooking.


Just before cooking, form chilled balls into patties about ½ inch thick. Heat barbecue grill or ridged grill pan (I used a cast iron pan) over medium heat. Coat grill or pan lightly with oil.

Place the patties on the grill or in pan and cook until browned and heated through, 4 to 5 minutes per side. It sure looks like a burger.


Served with a green salad and chipotle mayonnaise from the previous post. Or skip that for a vegan meal. If you wanted to be gluten free, substitute corn meal for the bread crumbs and flour.


The flavor is fine but perhaps they processed a little too long in the food processor. If I do them again, I may have them a little coarser.

Until next time, Eat Well & Keep Digging!

The Gastronomic Gardener
Garden blog http://amidwestgarden.blogspot.com/
Cooking blog http://ihopeyouarehungry.blogspot.com/
Twitter - www.twitter.com/DavidPOffutt
http://www.facebook.com/TheGastronomicGardener

Quick Chipotle Mayo

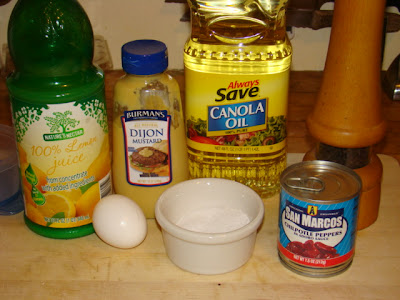
From Mark Bittman over at the New York Times (I am a fan) comes a ridiculously easy mayo method. No need for the slow drizzle and endless whisking. Use the food processor! Notice the little hole in the pusher tube. Take advantage of this feature to whip up homemade mayo in less than 2 minutes. In this case I'm adding some chipotle for extra kick.

Ingredients:
1 egg
1 cup oil (for aoli use olive oil, mayo - use something more neutral, like canola)
1 Tbs acid (lemon juice, sherry vinegar, white vinegar)
2 tsp Dijon mustard
2 canned chipotle peppers + a little of the adobo sauce
Salt & pepper to taste


Directions:
Put egg, lemon juice,mustard, salt, and pepper in the mixing bowl of the food processor.


Turn on processor and add 1 cup of oil into the the feeder tube (with a hole in the bottom). The one I have doesn't fit the whole cup so I had to do it in two batches. The feeder tube will drizzle the oil in a little at a time.

Processes for at least a minute. Add the chipotle. Process another 30 seconds. Done!


The fresh mayo will keep in the fridge for a couple weeks.


Until next time, Eat Well & Keep Digging!


The Gastronomic Gardener
Garden blog http://amidwestgarden.blogspot.com/
Cooking blog http://ihopeyouarehungry.blogspot.com/
Twitter - www.twitter.com/DavidPOffutt
http://www.facebook.com/TheGastronomicGardener

Thursday, January 27, 2011

Tacos de chicharrones

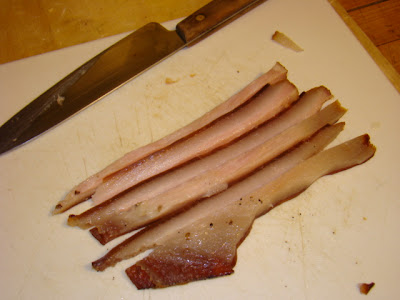
I've got some cured, smoked pork skin. A beautiful amber  color with a ton of flavor. I know because I sampled it last night.


What to do with it? Being a proponent of nose to tail dining, I checked out the Internet to see what I could see. Pig skin, AKA Chicharrones, can be used in many ways. Seems we don't want to waste anything, and I have this caramel colored skin and I'm not likely to throw it away... After all, life is not all about filet mignon. People eat this stuff! So... reading up a bit on the Internet I embarked on my journey.

I sliced it up.


Then diced it, added to a skillet and started  to cook it to render some fat. I added some broth to give it some steaming action.


As the water boiled off

and as the fat started to render, I added some green salsa I prepared back in August.


Cook over medium low until the skin is softer, (it won't ever get completely tender)  but until soft enough to eat.
Scoop into tortillas and add some plain yogurt (or sour cream) and enjoy.


Yes, it is on a paper plate,  and no it is not pretty. But it was chewy, and delicious in a porky sort of way. It would be different if the pork skin was not cured and smoked. Since it was, it was sweet,and savory and delicious. Not something to eat everyday, but I am glad I tried it. I'd love to have a Hispanic grandma make it for me.

Until next time, Eat Well & Keep Digging!

The Gastronomic Gardener
Garden blog http://amidwestgarden.blogspot.com/
Cooking blog http://ihopeyouarehungry.blogspot.com/
Twitter - www.twitter.com/DavidPOffutt
http://www.facebook.com/TheGastronomicGardener

Tuesday, January 25, 2011

Quick Hopping John and Jalapeno Cornbread

Sometimes the best dishes are the simplest.


This recipe for Hopping John leaves out the cooking of the black eyed peas, though you certainly can do it from scratch if you have dried peas. I'm also leaving out the traditional smoked ham hock, instead using some of the smoked pork skin I saved when smoking bacon. It should add the same flavor profile. Also going to add some swiss chard for color.

Traditionally Hopping John was served on New Years Day as a "good luck" meal with the peas representing pennies. Greens are added to represent paper money, or maybe because they are so darn good?  Use swiss chard, beet greens or spinach. As always the recipe is flexible. Change it up as you want.

Hopping John Ingredients:
1/4 cup (or 4 slices) bacon chopped or use lardons
1 chunk of smoked pork rind
2 cups (or 1 15.5 oz can) cooked black eyed peas
1 sweet red (or orange or yellow, just not green) bell pepper diced
1 bunch of greens rinsed and chopped as needed. The chard is cut off the center stalk.
1/2 onion diced (about 1/2 cup)
2 cups broth or water
salt and pepper to taste
Rice

Apparently I missed the ingredients shot, sorry it happens.


Directions:
In a heavy sauce pot over medium-high heat, add the bacon, onion, and peppers.


Cook stirring often until the bacon is renders its fat and vegetables are soft.


Add the cooked peas, the greens, and the pork rind, stir.


Add the broth, stir.


Cover and reduce heat to low. Cook for about 20 minutes until peas are very tender and creamy. Add more broth as needed to keep moist.

Remove pork rind and discard.

Serve over rice.

Jalapeno Corn bread.
This spicy cornbread should be a perfect accompaniment to the Hopping John.

Jalapeno Cornbread Ingredients:
Cooking spray
1 1/4 cups stone-ground cornmeal
3/4 tsp kosher salt
1/2 tsp baking soda
1 cup nonfat buttermilk (see note below)
1/2 cup (2 ounces) shredded  cheddar cheese
2 tablespoons minced pickled jalapeno peppers
1 1/2 tablespoons butter, melted
1 1/2 tablespoons honey
1 tablespoon canola oil
2 large eggs, lightly beaten

NOTE: If you don't have buttermilk, don't worry, just put 1 TBS of lemon juice or white vinegar in a measuring cup, and then filling the cup with milk to the one cup mark. let stand for 5 minutes, then use as buttermilk.


Directions:
Preheat oven to 375F
Place a 9-inch cast-iron skillet (or oven safe cookware)  coated with cooking spray in oven 5 minutes or until heated.

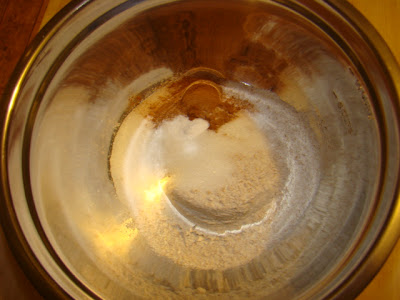
Combine cornmeal, salt, and baking soda in a large bowl, stirring with a whisk; make a well in center of mixture.


Combine buttermilk, cheese, jalapenos, butter, honey, oil, and eggs in a small bowl;


Add to cornmeal mixture. Stir just until combined.


Spoon mixture into preheated pan.


Bake at 375° for 30 minutes or until a wooden pick inserted in center comes out clean.


Cool in pan 10 minutes on a wire rack. Cut into 12 wedges.


Serve with the Hopping John.


Until next time. Eat Well & Keep Digging!


The Gastronomic Gardener
Garden blog http://amidwestgarden.blogspot.com/
Cooking blog http://ihopeyouarehungry.blogspot.com/
Twitter - www.twitter.com/DavidPOffutt
http://www.facebook.com/TheGastronomicGardener

Monday, January 24, 2011

Meatless Monday - Bulgar-Ricotta Pancakes


Another Meatless Monday. This time I'll do a whole grain pancake as shown by the NYT's Mark Bittman
I always have bulgar on hand, and instead of the honey or syrup, I'll use some apple pie filling I made back in October:

http://ihopeyouarehungry.blogspot.com/2010/10/canned-apple-pie-filling.html

Ingredients:

1/2 cup bulgar (any grind)
Salt
1 cup ricotta
1 cup sour cream or yogurt  (I used yogurt)
3 eggs
1 tablespoon grated orange zest
1 cup whole-wheat flour
2 tablespoons sugar
1 1/2 teaspoons cinnamon
1/4 teaspoon baking soda
1/2 cup raisins, optional  (I left these out)
Vegetable oil, for frying
Honey or maple syrup, for serving.  (I used the apples)


Heat the oven to 200 degrees. Put the bulgar and a pinch of salt in a bowl and add 1 1/4 cups boiling water. Stir once and let sit until more or less tender, 10 to 25 minutes. If any water remains, squeeze the bulgar in a cloth or put it in a fine-mesh strainer and press down on it.


Beat together the ricotta, sour cream or yogurt, eggs and orange zest.


In another bowl, combine the flour, sugar, cinnamon, baking soda and 1/2 teaspoon salt.


Stir the dry ingredients into the ricotta mixture, blending well but not beating. Gently fold in the bulgar and, if being used, the raisins.


Put a large skillet or griddle over medium heat. When a few drops of water dance on its surface, add a thin film of vegetable oil and let it become hot. Spoon out the batter, making any size pancakes you like. Cook until bubbles form on the top and pop, 2 to 3 minutes. Carefully flip the pancakes and cook until they’re browned on the other side, a couple of minutes more. You may have to rotate the cakes to cook them evenly, depending on the heat source and pan. As they finish, transfer them to a plate in the oven while you cook the remaining batter.


I served with the apple pie filling.


A bit heavier than a "normal" pancake, but toothsome and satisfying.

Try it today!  If not for dinner, then a weekend breakfast!


The Gastronomic Gardener
Garden blog http://amidwestgarden.blogspot.com/
Cooking blog http://ihopeyouarehungry.blogspot.com/
Twitter - www.twitter.com/DavidPOffutt
http://www.facebook.com/TheGastronomicGardener

Monday, January 17, 2011

Oven Roasted Cauliflower and Sweet Potato on Lentil Stew

Another meatless Monday. I love lentils and they make a nice base. Add a scoop of sweet oven roasted cauliflower and sweet potato, a slab of homemade bread, and no one will miss the animal protein.

The stew is very adaptable - what do you have in the crisper?

Here's what I have:

Lentils
Cauliflower
Yellow pepper
Carrot
Celery
Garlic
Yellow onion
Sweet potato
Grape Tomatoes

You'll also need some:
olive oil,
Salt & Pepper
Some herbs (I used rosemary)
4 cups of liquid. If you want this to be vegan you could use vegetable stock or even water. I used chicken broth.


Preheat the oven to 350F.
Break down the vegetables with your favorite knife. I enjoy this, it is somewhat Zen for me.


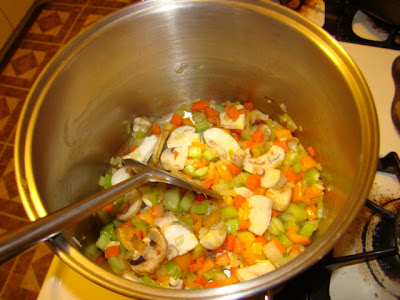
Put a little  extra virgin olive oil (or whatever you have) in big pot. Add the vegetables except for the sweet potato and cauliflower (they will go in the oven) and the garlic.
Add a generous  pinch of salt.


Cook stirring often until the onions are translucent and the fragrant.

Add the garlic.


I found some mushrooms so I put them in too.


Add the lentils.


Add 4 cups of liquid and tomatoes.


Bring to a boil, cover, reduce heat and simmer until lentils are tender - about 45 minutes.

Meanwhile...

Add about 1/3 cup (or less) of olive oil to a oven safe pan.
Add the cauliflower and sweet potatoes, a pinch of salt and the rosemary.

Toss to coat.


Put in the oven and roast, turn using a spatula or give them a good shake every 10 minutes or so. You're looking for a little browning on the edges and for the vegetables to be tender - about 35-40 minutes.

I was digging in the crisper and also found some spinach that needed to be used. Let's up the nutritional value!


It always surprises me how fast it breaks down. Looks (and smells) good!


Another 10 minutes or so, until the vegetables and lentils are tender.

Plate and enjoy!


I did add a splash of balsamic vinegar for a little sharpness. Delicious!

Until next time, Eat Well & Keep Digging!


The Gastronomic Gardener
Related Posts Plugin for WordPress, Blogger...