Tuesday, July 6, 2010

Bone-in Ribeye in cast iron skillet

 Salad? Who am I kidding?

I'll be honest, I'm not the best at grilling steaks on the BBQ. Some times I nail it, others times, I miss completely. I think it is the open flame that causes me consternation. So I was looking for a method that I would not ruin this gorgeous bone-in ribeye.


Brush with a little oil.

Salt and pepper.
 
Preheat both the grill and the cast iron pan for about 10 minutes on high. Get it good and smoking hot.
 
Flop in your steak. Don't touch it for a couple minutes.
 
After 2 minutes flip it.
 
After another 2 minutes, add a pat of butter and move to grill. Careful! It's very hot  and heavy.
 
Cook until 125F for medium rare. Remove and tent loosely for about 5 minutes.

 
Slice and serve, while I could have eaten the whole thing I split it with my wife and even have a little left over for lunch!
 
 Eat well!

My garden blog   http://amidwestgarden.blogspot.com/
My cooking blog   http://ihopeyouarehungry.blogspot.com/

Monday, July 5, 2010

Of salads and compost

After all the meat of the past couple weeks, tonight I'm craving a big salad.

Aside from making cake mixes, salad making  is where I started, with a small knife, standing on a stool helping my mother by chopping vegetables. She had enough to do trying to feed 12 people, so truthfully, by the time I was helping, a couple of the older siblings had likely moved away. But a big tossed/chopped was a mainstay of our dinner table.

Salad making is a lot like making soup. You root around in the fridge and pantry to see what can go into the bowl or pot.  Tonights' offering is romaine, carrot ribbons, mushrooms, onion, yellow bell pepper, chick peas, celery, tomato and avocado. I'll add the tomatoes and avocado later so as not to make the salad too soggy now.

When making a salad there are always scraps. Some are OK for eating, others I do not want to.

I keep a "soup bucket" which is just a quart container from yogurt or cottage cheese in the freezer, so usable vegetable trimmings, left over rice or pasta for example, may be saved to make a soup in the future. When the bucket is full, I make soup.  I don't like to throw food away so this works for me.

The material that is unsuitable goes into another bucket that ends up in the compost heap.

As I said the other day in my gardening blog, we pay to have our trash hauled away. It doesn't make any sense to me to have it in a landfill when I, with a little patience can improve the soil I am growing yet more vegetables in.

It keeps the circle intact, I don't have to pay to have it hauled away, and in the end it improves the soil. Conservation at every level!


Now about the dressing.....

Eat well!

As this post is pertinent to both  blogs I am double posting.


My garden blog  http://amidwestgarden.blogspot.com/

My cooking blog http://ihopeyouarehungry.blogspot.com/

Sunday, July 4, 2010

Ribs - low and slow

Today is the 4th of July, Independence Day, a day of celebration, hot BBQ, and cold beer. To that end I'm going to make some ribs. Specifically pork ribs.

I have a rack of spare ribs  - cut off the sternum, as well as some baby back ribs which of course come from near the back. The spare ribs have more meat but many folks prefer the baby back.

The idea is to get the flavor on/in the ribs before cooking.
I made a quick rub:

RUB Recipe
1/3 cup brown sugar
1 TBS Coarse salt
1 TBS Sweet Spanish paprika "Dulce"
1 tsp garlic powder
1 tsp ground cumin
1 tsp ground mustard
1 tsp oregano
1/2 tsp thyme
1/2 tsp black pepper
1/2 tsp chili powder

Here it is in smokey glory

Next unpack and rinse the ribs, then remove the membrane from the bone side, turn them over and dry them well so the rub & smoke will adhere. The baby back are in the back in the photo and the spare ribs in the foreground.
Put a generous amount of the rub on the meat side. Some folks like to put it on the bone side as well, I think it is a waste.
At this point you could wrap them up and put them into the fridge up to over night. I don't have that luxury so I'll get them in the "smoker" now. I'm not trying to cook them in here, just get some flavor on them.

Here is my rigged cold smoker in my gas grill.

A small inexpensive hot plate, caste iron wood chip box, and maple chips. I hope it works.
Add the ribs and smoke for about an hour.
 
Now into the oven at 220 for 3 hours
 
Plus 2 hours at 250 with a little water in the pan.  Here's what they look like out of the oven. - That bald spot? Well, I HAD to test them!
Double wrap in foil and take to the party.
Crisp them up on the grill with your favorite BBQ sauce or eat them dry!

My garden blog http://amidwestgarden.blogspot.com/
My cooking blog  http://ihopeyouarehungry.blogspot.com/

Friday, July 2, 2010

Steak in a flash

With the cooler weather we've had, meat on the grill has sounded more appealing. I think a ribeye is the best steak there is. Just my opinion.

Let's make one on the grill.

Start with the best steak you can. This really goes for any cooking. Always buy the best ingredients you can afford, you and your guests will appreciate it in the long run.

Let the steak come up to room temperature.

While it came up to temperature, I sliced some vegetables to saute, red onion, mushroom, and red pepper.


Season the steak, it can be as simple as salt and pepper, or you can use a rub, use your imagination.


Prep the grill. I turn both sides up to high and after 5-10 minutes I scrape it down, then oil it. That is probably the singularly best advice I ever got about grilling.

While the grill was heating up, I started the vegetables.

Someone asked why I use the cast iron. Simply put, I want something that I won't have to replace every few years.

Next the steak hits the grill, - 7 minutes a side, moving every 3.5 minutes


Take it off and let it rest.
Slice it up, top it off with the vegetables from the pan, some sliced tomato, and slaw. It was damn tasty.
 

Eat Well!


My garden blog http://amidwestgarden.blogspot.com/
My cooking blog  http://ihopeyouarehungry.blogspot.com/

Wednesday, June 30, 2010

Get Yer Fresh Bratwurst Here!

Finally got around to making some fresh sausage. Bratwurst to be more specific.

I've been wanting to learn/teach myself how to do this for a long time, and have done the reading, the research - bought some equipment to start out.

We start with a pork shoulder - also called pork butt - and we slice it into strips for easy feeding into the grinder.
It's 2.5 lbs shoulder and  .5 lb pork fat. Weighed out and into big ziplocs to chill.
  
Meanwhile measure and grind the fresh spices. They include nutmeg, mace, garlic, sugar, salt, black pepper, mustard seed, and  sage. There are two plates of spices as there are two batches.
 
Put meat strips and spices in a bowl, mix together then grind on 1/4" plate. The Kitchen Aid worked pretty well for this, put the ground sausage back in the bag and back onto the fridge to chill.


At this point a taste test is required, so make a small patty and fry it up - pretty darn good!
 

Next, soak some hog casings in water for at least 30 minutes to wash the salt off. I wasn't sure what to expect but they did not have an off smell and they were slimy like mucus. Weird but not completely gross.
 
Next assemble the stuffer. This did not work nearly as well as grinding, feeding was a bit of a hassle - I will look into a better stuffer for the future.
I did have some issues with the casing tearing - yes, I did lube the horn but it still tore some.  Not a big deal, just tied them off the best I could with string. The casing did have the variability one might expect from a natural product.

Here is the first result. I will poach them in beer and finish them on the grill.
Into the hot tub for you brats!
 
The second batch turned out much better, probably combination of  a better casing, colder ground meat (the second batch chilled overnight) and experience.
 
Ok, everybody swim in circles!
 
Well my fault I stepped away while they were poaching and some split. Darn. I think they will still be delicious.

They were and are.
 
Eat Well!

Wednesday, June 23, 2010

Excitement!

Oh Boy!

My order just arrived!

KitchenAid Sausage Stuffer Kit, KitchenAid Food Tray Attachment,
Natural Hog Casings, and Bruce Aidells's Complete Sausage Book, Can fresh bratwurst be far away?   I need to get that pork shoulder out of the freezer!
Stay tuned.

Tuesday, June 22, 2010

Braised Quail


Had four quail in the freezer and decided today was the day.

Thawed them out and trussed up the legs + salt & pepper.
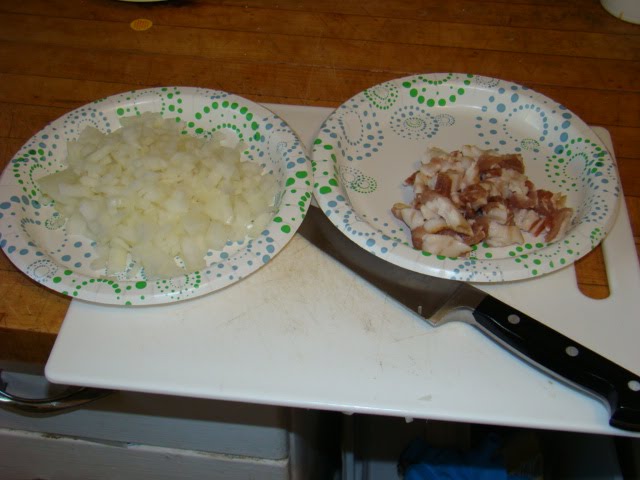
Diced a big onion and made lardons from 4 strips of bacon.
 
Heat up some butter and olive oil.
 
Start browning the little birds.
 
Meanwhile prep some mushrooms - recipe calls for wild but I had these on hand, so I used them instead.
Remove quail, reduce heat, add bacon, cook until crisp.
 
Remove bacon, add onion and 1 TBS flour.
 
Cook while stirring 3-5 minutes.

Deglaze with wine. Recipe called for white wine, I had red open so that is what I used.
 
Return birds to pan.

At this point the recipe called for veal stock. Uh, I don't have any, but I did have some leftover gravy from when I made hassenpfeffer in the freezer, so I used that. I added a cup or so of chicken stock.
 
Some pale fellas inthe hot tub!

Cover them up and simmer for 20 minutes. Meanwhile start the wild rice and have an appetizer!
 
mmm Fresh bread and quality anchovies

After 20 minutes, uncover, remove quail from pan and add chopped mushrooms. Cook until sauce is reduced and mushrooms are cooked - about 7 minutes.
 
 Add fowl back to pan. Add handful of chopped parsely, and heat through.
 
Braised Quail with mushroom gravy on wild rice.
 
All in all it was  pretty good, I wouldn't bother with the quail in the future, I'd use cornish hens.
Enjoy!
Related Posts Plugin for WordPress, Blogger...