Showing posts with label Carrots. Show all posts

Sunday, August 14, 2011

Pickled Gingered Carrots

Last week I was tucking into some bibimbap (a lovely light Korean dish heavy on vegetables) for lunch and the ingredient that struck me the most was the pickled ginger carrots. Crisp, cool, refreshing. I decided to see if I could recreate them. Some searching around led me to a few recipes.  This one is adapted from one that was 1/2 carrot 1/2 daikon radish. I used a bit more ginger and only carrots. I used a mandolin for part of it, but since these are cut lengthwise, I used a knife to finish them. Don't get me started on how I lost a big chunk of thumb to a mandolin some years back. 

Makes 5 pints.

Ingredients:
4 lbs. carrots peeled and julienned lengthwise in long strips
3 cups white vinegar
3 cups water
1 ½ cups sugar
2-3 tablespoons grated fresh ginger
6 jalapeno pepper (optional)

Directions:
Prep hot water canning bath and prepare your jars and lids.

Wash, peel and julienne carrots into long strips. 4 lbs may take a while, take your time and be careful!

In big sauce pan add water, vinegar, sugar and ginger.

Bring to a boil over medium heat and stir until sugar dissolves.

Add julienned carrots, stir and immediately turn the  heat off.

Place a pepper in each jar (if using).

Pack carrots into hot jars.

Ladle hot pickling liquid into jars, leaving ½ inch of headroom. Remove air bubbles and adjust head-space adding more liquid if needed.  

Wipe jar rims and add lids and bands.

Process for 20 minutes (timed from the boil). Let cool undisturbed for 24 hours.


I'm going to let these rest for a few weeks before using in my own bibimbap. I also foresee them being a great addition to any salad or adding a nice crunch to a sandwich. Stay Tuned!

Until next time, Eat Well & Keep Digging! 

The Gastronomic Gardener
Garden blog http://amidwestgarden.blogspot.com/
Cooking blog http://ihopeyouarehungry.blogspot.com/
Twitter - www.twitter.com/gastrogardener
http://www.facebook.com/TheGastronomicGardener
email: thegastronomicgardener at gmail dot com

Monday, March 7, 2011

Meatless Monday - Moosewood's Carrot Mushroom loaf


Straight from Moosewood cookbook this looked interesting. A couple notes, I don't recommend this for a quickie dinner. Even using the food processor it took a while to get it  all prepped.   Happily Mollie Katzen mentions that once cooked this freezes very well so maybe make it ahead of time.

You'll also see that perhaps I over processed the mushrooms. It'll impact texture. Finally I used reduced fat cheese. I must've grabbed the wrong one at the market, oh well.


2 cups minced onion
1 Tbs butter
1 lb mushrooms, chopped
1 ½ tsp salt
1 tsp basil
1 tsp thyme
1 tsp dill
3 to 4 medium cloves garlic, minced
1 ½ lbs carrots, grated (about 6 cups)
2 cups superb bread crumbs
1 cup (packed) grated cheddar
2 eggs, beaten
Black pepper, to taste


Lightly oil a 9 x 13-inch baking pan. Preheat the oven to 350F

In a large skillet, sauté onions in butter over medium heat for about 5 minutes.


Add mushrooms, salt, herbs, and garlic, and continue to sauté for about 10 minutes.


In a large bowl, combine carrots, breadcrumbs, cheese, eggs, and pepper.


Add the sautéed mixture and mix well.


Has interesting texture


Spread into the prepared pan and sprinkle with your choice of toppings.


Cover the pan with foil.

Bake for 30 minutes covered, then uncover and bake minutes more. Serve hot or warm.


Ya know... gotta say... it's got decent flavor but it is missing something - maybe a full fat cheese. I'd make it again but serve as a side dish or something on a buffet, not as dinner.

Another lesson learned.

Until next time, Eat well & Keep Digging!


The Gastronomic Gardener
Garden blog http://amidwestgarden.blogspot.com/
Cooking blog http://ihopeyouarehungry.blogspot.com/
Twitter - www.twitter.com/DavidPOffutt
http://www.facebook.com/TheGastronomicGardener

Thursday, November 25, 2010

Festive Penguins

These whimsical appetizers are easy to make and are sure to be a hit! While they take a little time, they are not difficult and everyone, especially children, seem to love them.

Ingredients:
Carrot
Black olives
Cream or Neufchatel Cheese softened
Garlic  Powder


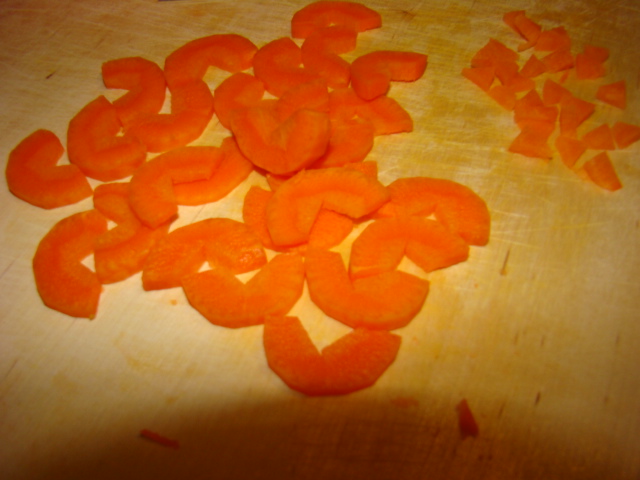
Peel and halve the carrot. Cut into half disks


Cut a small triangle out of the half disks. Now you have feet and beaks!


Using kitchen shears, cut a V shaped notch out of half of the olives.


Season the cheese with a little garlic powder, mix well and spoon into a small plastic bag. Snip off a little piece in the corner of the bag to make a quick piping bag.
Pipe the mixture into the cut slit in one olive, and into the hole of one you left whole. Add a small triangle into the hole to make the beak. Use a toothpick to thread the head onto the body and onto the carrot "feet."


Continue until you are out of olives. 


Enjoy!
Until next time, Eat Well & Keep Digging!

The Gastronomic Gardener
Garden blog http://amidwestgarden.blogspot.com/
Cooking blog http://ihopeyouarehungry.blogspot.com/
Twitter - www.twitter.com/DavidPOffutt
http://www.facebook.com/TheGastronomicGardener

Sunday, November 14, 2010

Thai Pumpkin Curry

Pumpkin is a highly versatile and today I made a Vegetarian Pumpkin Curry. This recipe is adapted from About.com’s Darlene Schmidt recipe. A rich dish, citrus tang and mild glow make this a delicious option on a cool autumn night. There is a long list of ingredients but do not let that scare you off.


Serves 6


Ingredients:
For the vegetables:
½ small pumpkin
1 small or ½ large yam or sweet potato peeled and cubed
1-2 carrots peeled and cut into thick slices
1 yellow bell pepper large dice
1 cup chopped tomato or 1 cup cherry tomatoes
1 can chickpeas drained and rinsed
Grated orange rind from 1 orange – (save the orange for the sauce)
1 tbs oil
Green onion for garnish


For the curry sauce:
3-4 cloves of garlic
3 tbs Thai chili sauce ( you can use 1-2 fresh chilis)
1 can coconut milk
3 tbs lemon juice
juice of 1 orange
2 ½ tbs soy sauce
1 tbs brown sugar
1 tbs apple cider vinegar
1 tbs ground coriander seeds
1 tbs ground cumin
1 tsp fennel seed
½ tsp turmeric
½ onion  sliced


Directions:
Put all sauce ingredients in food processor (or blender). Process until smooth. Set aside.
Prepare the pumpkin by scooping out the seeds, slice off skin and cube flesh.

Put wok over medium high heat, add oil.
When oil is hot, add pumpkin, yam, and carrots.


Stir fry for 2 minutes, add curry sauce, stir well.


Bring to a boil, reduce heat, and cover.
Simmer until vegetables are fork tender – 15-20 minutes, stirring occasionally.
Add bell pepper, tomatoes, chickpeas and orange rind, stir to incorporate.


Simmer for 2 minutes


Serve with rice, garnish with sliced green onion.


This was an excellent dish, I highly recommend it!

Until next time Eat Well & Keep Digging.

The Gastronomic Gardener
Garden blog http://amidwestgarden.blogspot.com/
Cooking blog http://ihopeyouarehungry.blogspot.com/
Twitter - www.twitter.com/DavidPOffutt
http://www.facebook.com/TheGastronomicGardener

Sunday, August 8, 2010

Carrots for the winter

I'm not a huge fan of carrots, not one of my favorites to munch raw, unlike a just picked tomato, where a little salt and pepper on top and I'm happy.

That said, the little carrots harvested were fun to pull up and will be great in the deep of winter. I'll make my mother's Honey Ginger Carrots. Those I like and they bring fond remembrances.

I started with a couple pounds of washed fresh carrots.


Trimmed down and  portion out - after cleaning and taking the leaf ends off I'll end up with 4 6oz bags.The scale helps with the portioning. If you follow this blog you'll notice the cast iron skillet. It is almost always there. It makes me happy to have it on the stove top.


I'm following the instructions From Ball Blue Book - guide to preserving. According to them I should blanch for 3 minutes


followed by 3 minutes in an ice bath.


I dried them off and bagged them in the vacuum sealer. Into the freezer to await their turn to shine.


Eat Well & Keep digging

The Gastronomic Gardener
My garden blog http://amidwestgarden.blogspot.com/
My cooking blog http://ihopeyouarehungry.blogspot.com/
Twitter - www.twitter.com/DavidPOffutt
Related Posts Plugin for WordPress, Blogger...