Showing posts with label Apples. Show all posts

Monday, January 24, 2011

Meatless Monday - Bulgar-Ricotta Pancakes


Another Meatless Monday. This time I'll do a whole grain pancake as shown by the NYT's Mark Bittman
I always have bulgar on hand, and instead of the honey or syrup, I'll use some apple pie filling I made back in October:

http://ihopeyouarehungry.blogspot.com/2010/10/canned-apple-pie-filling.html

Ingredients:

1/2 cup bulgar (any grind)
Salt
1 cup ricotta
1 cup sour cream or yogurt  (I used yogurt)
3 eggs
1 tablespoon grated orange zest
1 cup whole-wheat flour
2 tablespoons sugar
1 1/2 teaspoons cinnamon
1/4 teaspoon baking soda
1/2 cup raisins, optional  (I left these out)
Vegetable oil, for frying
Honey or maple syrup, for serving.  (I used the apples)


Heat the oven to 200 degrees. Put the bulgar and a pinch of salt in a bowl and add 1 1/4 cups boiling water. Stir once and let sit until more or less tender, 10 to 25 minutes. If any water remains, squeeze the bulgar in a cloth or put it in a fine-mesh strainer and press down on it.


Beat together the ricotta, sour cream or yogurt, eggs and orange zest.


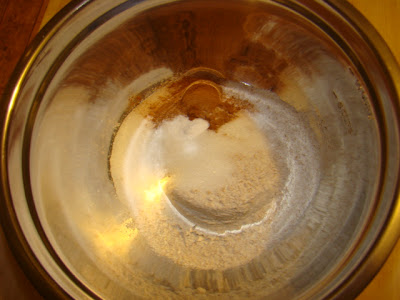
In another bowl, combine the flour, sugar, cinnamon, baking soda and 1/2 teaspoon salt.


Stir the dry ingredients into the ricotta mixture, blending well but not beating. Gently fold in the bulgar and, if being used, the raisins.


Put a large skillet or griddle over medium heat. When a few drops of water dance on its surface, add a thin film of vegetable oil and let it become hot. Spoon out the batter, making any size pancakes you like. Cook until bubbles form on the top and pop, 2 to 3 minutes. Carefully flip the pancakes and cook until they’re browned on the other side, a couple of minutes more. You may have to rotate the cakes to cook them evenly, depending on the heat source and pan. As they finish, transfer them to a plate in the oven while you cook the remaining batter.


I served with the apple pie filling.


A bit heavier than a "normal" pancake, but toothsome and satisfying.

Try it today!  If not for dinner, then a weekend breakfast!


The Gastronomic Gardener
Garden blog http://amidwestgarden.blogspot.com/
Cooking blog http://ihopeyouarehungry.blogspot.com/
Twitter - www.twitter.com/DavidPOffutt
http://www.facebook.com/TheGastronomicGardener

Sunday, October 10, 2010

Dehydrating Apples

Still putting up apples, thought it was time to try out the dehydrator.

Here's the setup. Dilute lemon juice, apples, peeler.


The peeler certainly makes short work of the apples!


 After a bath in the dilute lemon juice, the apples go into the trays.


Last tray ready to go.


All assembled and dehydrating.


Per the instructions,  5-9 hours from now I'll have nice dehydrated slices.

Later this afternoon, the apples were done at about 4.5 hours. The book said 5-9, but it was warm today, perhaps the sped things up.

It's pretty cool that 4 big apples fit in a quart jar!


Until Next Time, Eat Well & Keep Digging!


The Gastronomic Gardener
Garden blog http://amidwestgarden.blogspot.com/
Cooking blog http://ihopeyouarehungry.blogspot.com/
Twitter - www.twitter.com/DavidPOffutt

Sunday, October 3, 2010

Canned Apple Pie Filling

We got all those apples last week. We've done apple butter, now we'll do Apple Pie Filling.

This recipe is from allrecipes.com

Ingredients:
4 1/2 cups white sugar
1 cup cornstarch
2 tsp ground cinnamon
1/4 tsp  ground nutmeg
2 tsp salt
10 cups water
2 drops yellow food coloring (I skipped this)
3 tbs lemon juice
6 lbs apple
In a large pan combine sugar, cornstarch, cinnamon and nutmeg. Add salt and water and mix,

Bring to a boil and cook until thick and bubbly

Remove from heat, add lemon juice and food coloring.

Prepare canning jars, lids and bands.

Peel, core and slice apples, Pack the sliced apples into hot jars leaving a 1/2" headspace.
This thing makes peeling apples a breeze!


I soaked them for a bit in a diluted lemon juice.


Fill jars with hot syrup, and remove air bubbles with a knife (I recommend a plastic knife).

Adjust 2 piece lids and process in a watter bath canner for 20 minutes.


This should be good in pie, over ice cream, hmm how else can I enjoy this?

Until next time, Eat Well & Keep Digging

The Gastronomic Gardener
Garden blog http://amidwestgarden.blogspot.com/
Cooking blog http://ihopeyouarehungry.blogspot.com/
Twitter - www.twitter.com/DavidPOffutt
http://www.facebook.com/TheGastronomicGardener

Sunday, September 26, 2010

Apple Butter - a taste of autumn preserved!

Yesterday the DW and I went out to an apple orchard to walk around, get some apples, and some apple cider donuts. The doughnuts were sublime, light, fluffy and warm, they almost melt in your mouth, but I digress.

We ended up with 1/2 a peck each of Jonagold and Honeycrisp. DW prefers the Jonogold, I like the Honeycrisp. That's about 20 lbs of apples.  It is unlikely we'll eat that many out of hand so I immediately started looking in my canning book for recipes. I decided to make some apple butter, if you are not familiar with it, it is like very thick and highly spiced applesauce - great on toast for breakfast instead of jam or jelly. I used the Honeycrisp for this  recipe.


Canned Apple Butter  - Makes 3 pints.

Ingredients:
4 lbs apples, peeled, cored and quartered.
2 cups water
2 tsp cinnamon
1/4 tsp ground clove

Honeycrisp are large heavy fruit - here is the 4 lbs!


Using the super peeler, (no I don't feel like I am cheating) all I have to turn the crank! This makes very short work of the apples. All peelings go right out to the compost pile.


To make the apple puree, put the prepped apples into a large pot with 2 cups of water. 


Simmer until soft.


Run the cooked apples through the food mill with the largest screen - you want a puree not liquid.

Return the puree to the pot, add the sugar and spices.


Cook over medium head until thickened and puree will round up on a spoon. That is, if you scoops some out, it has enough body to be a small mound on a spoon.


Prepare your jars for canning following manufacturers instructions. Here is my filling station.


Fill jars, remove any air bubbles, leave 1/4" head space, adjust 2 piece lids, and process in hot water canner for 10 minutes.


As I had the water canner  already setup and had all the ingredients on hand, I went ahead and  made another batch of the Eggplant Tomato Relish. - another 6 1/2 pints.


As you can see, by this point it was dark outside. I cleaned up and called it a night.


Until next time, Eat Well & Keep digging!


The Gastronomic Gardener
Garden blog http://amidwestgarden.blogspot.com/
Cooking blog http://ihopeyouarehungry.blogspot.com/
Twitter - www.twitter.com/DavidPOffutt
Related Posts Plugin for WordPress, Blogger...