Wednesday, June 30, 2010

Get Yer Fresh Bratwurst Here!

Finally got around to making some fresh sausage. Bratwurst to be more specific.

I've been wanting to learn/teach myself how to do this for a long time, and have done the reading, the research - bought some equipment to start out.

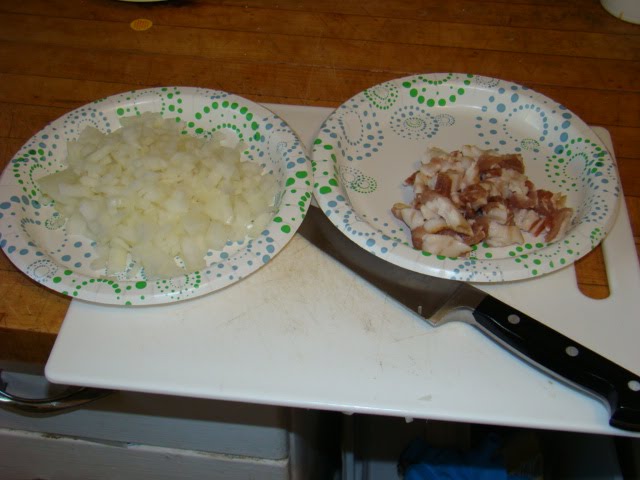
We start with a pork shoulder - also called pork butt - and we slice it into strips for easy feeding into the grinder.
It's 2.5 lbs shoulder and  .5 lb pork fat. Weighed out and into big ziplocs to chill.
  
Meanwhile measure and grind the fresh spices. They include nutmeg, mace, garlic, sugar, salt, black pepper, mustard seed, and  sage. There are two plates of spices as there are two batches.
 
Put meat strips and spices in a bowl, mix together then grind on 1/4" plate. The Kitchen Aid worked pretty well for this, put the ground sausage back in the bag and back onto the fridge to chill.


At this point a taste test is required, so make a small patty and fry it up - pretty darn good!
 

Next, soak some hog casings in water for at least 30 minutes to wash the salt off. I wasn't sure what to expect but they did not have an off smell and they were slimy like mucus. Weird but not completely gross.
 
Next assemble the stuffer. This did not work nearly as well as grinding, feeding was a bit of a hassle - I will look into a better stuffer for the future.
I did have some issues with the casing tearing - yes, I did lube the horn but it still tore some.  Not a big deal, just tied them off the best I could with string. The casing did have the variability one might expect from a natural product.

Here is the first result. I will poach them in beer and finish them on the grill.
Into the hot tub for you brats!
 
The second batch turned out much better, probably combination of  a better casing, colder ground meat (the second batch chilled overnight) and experience.
 
Ok, everybody swim in circles!
 
Well my fault I stepped away while they were poaching and some split. Darn. I think they will still be delicious.

They were and are.
 
Eat Well!

Wednesday, June 23, 2010

Excitement!

Oh Boy!

My order just arrived!

KitchenAid Sausage Stuffer Kit, KitchenAid Food Tray Attachment,
Natural Hog Casings, and Bruce Aidells's Complete Sausage Book, Can fresh bratwurst be far away?   I need to get that pork shoulder out of the freezer!
Stay tuned.

Tuesday, June 22, 2010

Braised Quail


Had four quail in the freezer and decided today was the day.

Thawed them out and trussed up the legs + salt & pepper.
Diced a big onion and made lardons from 4 strips of bacon.
 
Heat up some butter and olive oil.
 
Start browning the little birds.
 
Meanwhile prep some mushrooms - recipe calls for wild but I had these on hand, so I used them instead.
Remove quail, reduce heat, add bacon, cook until crisp.
 
Remove bacon, add onion and 1 TBS flour.
 
Cook while stirring 3-5 minutes.

Deglaze with wine. Recipe called for white wine, I had red open so that is what I used.
 
Return birds to pan.

At this point the recipe called for veal stock. Uh, I don't have any, but I did have some leftover gravy from when I made hassenpfeffer in the freezer, so I used that. I added a cup or so of chicken stock.
 
Some pale fellas inthe hot tub!

Cover them up and simmer for 20 minutes. Meanwhile start the wild rice and have an appetizer!
 
mmm Fresh bread and quality anchovies

After 20 minutes, uncover, remove quail from pan and add chopped mushrooms. Cook until sauce is reduced and mushrooms are cooked - about 7 minutes.
 
 Add fowl back to pan. Add handful of chopped parsely, and heat through.
 
Braised Quail with mushroom gravy on wild rice.
 
All in all it was  pretty good, I wouldn't bother with the quail in the future, I'd use cornish hens.
Enjoy!

Easy Bread #2


I've already talked about Jim Lahey's fabulous No-Knead Bread here: http://ihopeyouarehungry.blogspot.com/2010/06/no-knead-bread.html

That is a really great recipe and makes an impressive loaf with a super crust. However - it takes 18 hours and unless you have a ton of counter space you're not going to have these loaves in constant production. At least I'm not. I save it for a party, a planned dinner etc...

But what if you want fresh bread day to day? Well, thanks to the book Artisan Bread in Five Minutes a Day: The Discovery That Revolutionizes Home Baking you can.
 

I have been messing with the basic recipe for about a month. It makes a great loaf for dinner after work, rolls, even pizza! In fact, the pizza in the header of my blog comes from this recipe.

It is very straightforward and simple - plus, once you stir the dough - you can have bread from the batch for up to two weeks. The longer it goes in the fridge (yes, the fridge!) the more character and sough-dough attributes it takes on. Unlike the requirement for a heavy pot with a lid, this method needs a pizza stone and peel - though the back of a cookie sheet could be used in a pinch for getting a loaf into the oven, and a broiler pan for water. This is crucial for a crisp crust.

Let's make the basic recipe.

Ingredients
3 cups lukewarm water
1.5 TBS granulated yeast
1.5 TBS kosher salt or other course salt
6.5 cups unsifted, unbleached, all purpose white flour measured by the "scoop and sweep" method
Cornmeal for pizza peel


Put  warm water into container, add yeast and salt.
Add flour and stir till no longer dry.
Now the easy part, put a lid on it (not airtight) and let it sit on the counter for a couple (2) hours. You can use a portion of the dough at any time after this point. Look how much it has risen and the nice bubble activity from the yeast.
 For now we put it in the fridge.

The next day.....

I assemble the needed equipment -
Pizza peel.
 
Put the baking stone and broiler pan in the oven.
 
Add some corn meal to the peel to allow the loaf to slide off.
 
Sprinkle the surface of the dough in the bucket with a little flour. Grab about a grapefruit size piece of dough.
 
Sprinkle a little flour on that and turn the dough moving the top to the bottom as you go until you have a smooth surface.
 
Put the dough on the cornmeal "lubricated" peel. Set the timer for 20 minutes. The bread will rest for 40 minutes, but 20 minutes from baking we'll preheat the oven (with the stone and the pan inside) to 450F.
 
As I said this will not make a large loaf but it is good for up to 4 people for dinner.

Just before baking sprinkle a little flour on top of the doughball and slash with a serrated knife. The flour keeps the knife from sticking. The authors call this "Dust and Slash." Catchy, huh?
 
At baking time run a cup hot water into a measuring cup.

Slide the loaf  onto the stone and quickly add the hot water to the pan. This is the secret to a crunchy crust.

Bake for 30 minutes and this is what you get.
 
 
Let this cool, slice, and eat!

Enjoy!

Sweet Pickles and First Canning attempt


I really like sweet pickles, and we are growing some cucumbers at the veggie plot so I of course am impatient. I reasoned that it would be good practice to try to jar some pickles. Additionally, I hope to have an enormous amount of tomatoes to can so I wanted to put myself through the paces once or twice before we have 50 lbs of tomatoes on our hands!

This first attempt was in the kitchen, in the future and at the peak of harvest I intend to set up a canning station outdoors using some turkey fryer stands. This hopefully will make it more comfortable.

My intent for this has been ongoing; early this spring I picked up some used canning equipment and jars for a song off  Craigslist.

Let's see how it all turned out. (DISCLAIMER: This is not step by step all inclusive instructions. If you choose to can produce or other foods, please get proper equipment and instructions and follow them to the letter. The risk of serious food borne illness is very real. Proceed at your own risk.)

I went to the market and bought 5 lbs of small mexican cucumbers. Brought them home and washed them well.

The recipe calls for 7lbs of cucumumber and 8 pint jars so I will likey have too many jars - better too many than not enough.

Wash the canning equipment and dry.
Crinkle cut the cucumbers. I could have just used a knife but I like the crinkle cuts.
 
Mix the pickling spices with 5 cups sugar and 5 cups vinegar. Bring to a boil.
 
Pour over the cucumbers and let steep for about 30 minutes as it cools.
 
All jarred and put into water bath canner. Bring to a boil and let process 15 minutes.
 
Remove from bath and let cool. The lids all pinged and are sucked down appropriately. I'll let these rest for a month or two before trying them out.

The finished product.
 
Happy Eating!
Related Posts Plugin for WordPress, Blogger...