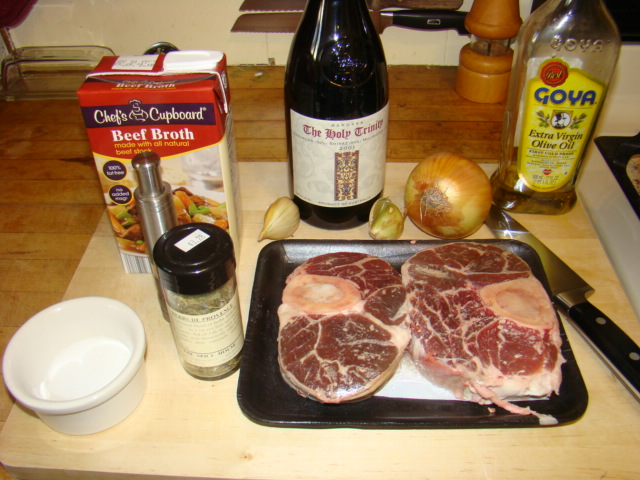
Sunday, November 28, 2010

Red Wine Braised Beef Shanks

I had a couple beef shanks in the freezer that I took out to thaw yesterday.  Shanks need a long slow cooking and this is a perfect technique.

Ingredients:


1.5 to 3 lbs beef shank
1 large onion, halved and sliced
4 cloves garlic, peeled and lightly smashed
1 tbsp Herbs de Provence
1/2 cup Red Wine
Beef Stock, to cover
Olive Oil, for searing
Salt and pepper to taste


Yes, I used a very nice wine but it will go great with dinner!


Directions:

Place a large dutch oven or stock-pot with a tight fitting lid over medium high heat.
Season both sides of beef generously with salt and pepper.
Add 2 tbsp. olive oil to pot and swirl to coat.
Place Beef shank in pan and cook for 2-4 minutes per side, or until a deep, rich crust is formed.


Add onions, garlic and herbs.


Pour wine over shank and shake pan vigorously.

Add stock until beef is barely visible.


Press vegetables down into the liquid.
Reduce heat to low, cover and simmer for 4 to 5 hours, or until beef is fork-tender.


Test for seasoning and simmer an additional 20 minutes. At this point I removed them and put them in a warm oven wrapped in foil.

While the shanks were cooking I made the white beans. I make them sort of like risotto, a slow simmer slowly adding broth - in this case beef broth.

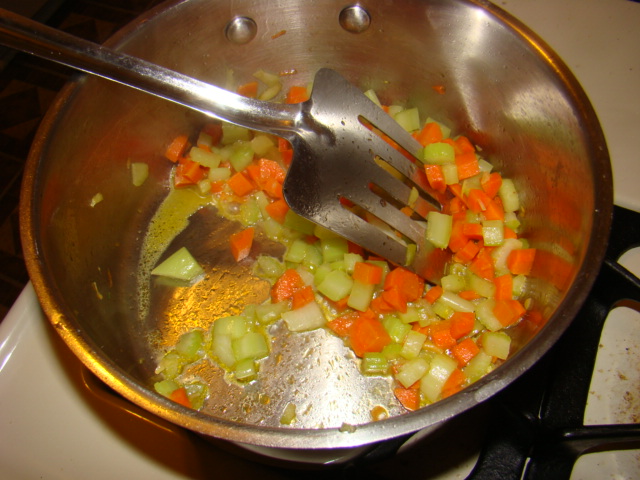
In a pan over medium high heat, add some garlic.


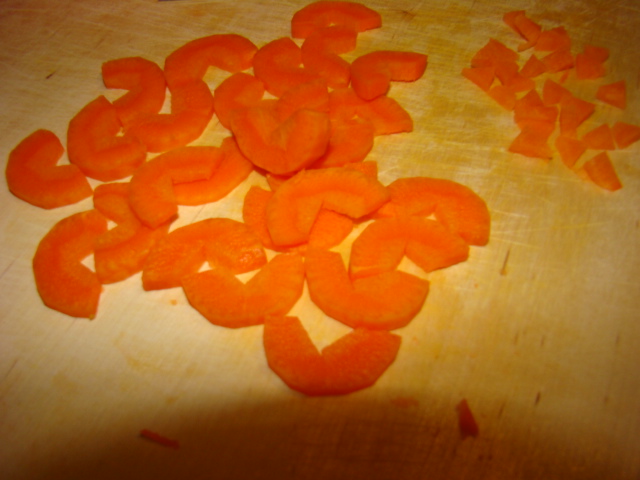
Add 1  diced carrot, 2 diced celery stalks and a little broth, cook until vegetables are tender. 


Add beans, and some broth.


When beans are tender, mash them coarsely, and add a little more broth.


Simmer the beans on low heat to drive some of the moisture out.  

Meanwhile, strain the broth, return liquid to the pot, increase the heat to high, add a tablespoon of butter and bring to a boil.


Add a little slurry of cornstarch and water. Add to the broth, and wisk until brot thickens into a gravy.


Remove shanks from oven.


Plate some bean puree, a shank, and spoon some of the gravy over the top. I must say, it was fantastic! Rich gravy, melt in your mouth beef, and hearty beans. Make this soon!


Until next time, Eat Well & Keep Digging!


The Gastronomic Gardener
Garden blog http://amidwestgarden.blogspot.com/
Cooking blog http://ihopeyouarehungry.blogspot.com/
Twitter - www.twitter.com/DavidPOffutt

Fried chickpeas with chorizo and spinach

Straight from the New York Times' (Wed Feb 24 2010) Mark Bittman (I am a fan), this simple dish was perfect on a cold night. The chorizo is the cured  & dried Spanish kind, not the loose fresh Mexican kind. Frying the chick peas gives them has a nice crunch they normally don't have.

Ingredients:
1/4 cup olive oil, plus a little extra for drizzling
2 cups cooked chickpeas, as dry as possible (use paper towels or a dish towel to blot them dry)
Salt and pepper to taste
4 oz dried chorizo diced
1/2 lb spinach
1/4 cup Sherry (I skipped this)
1 to 2 cups bread crumbs


Heat the broiler

Add 3 tbs olive oil to skillet big enough to hold beans in a single layer over medium high heat. When oil is hot, add chickpeas, salt and pepper.


Reduce heat to medium  and cook, shaking pan to brown chickpeas, - about 10 minutes. The beans will get a nice color.


Add chorizo and cook another 5-8 minutes,


until the chorizo gives up some color and starts to crisp.


Remove chickpeas and chorizo to a bowl


Add remaining oil to the pan, when hot add the spinach, season with salt and pepper,


Cook over medium low heat until spinach is very soft and almost all liquid has evaporated. This will cook very quickly.


Add chickpeas and chorizo back to pan, toss to combine.


Add bread crumbs and drizzle with olive oil.


Put pan under broiler to lightly brown the top.


 Serve hot or room temperature.


This the the second time I've made this. It is surprisingly filling and delicious!

Until next time, Eat Well & Keep Digging!

The Gastronomic Gardener
Garden blog http://amidwestgarden.blogspot.com/
Cooking blog http://ihopeyouarehungry.blogspot.com/
Twitter - www.twitter.com/DavidPOffutt

Saturday, November 27, 2010

Smoke Shack Build - cold smoker (Part 1)

I've been wanting to build a smoke shack for quite a while - ok about a year. I want to make my own bacon and smoke sausages which will expand my repertoire beyond bratwurst.  Cold smoking is smoking under 90F, preferably a little cooler than that. With that in mind there are a few other considerations:
  • I don't have room for a permanent installation. Living in the western Chicago burbs, my season for cold smoking  will run from October to April.
  •  It needs to be relatively inexpensive (I've done this for about $150)
  • I want it to be attractive - no little metal store bought box costing twice as much for me!
  • I am not a carpenter! The finished product is not perfect or even perfectly square, but it should work
  • It needs to be relatively small. I'm not doing any half hogs. The finished smoke box itself is about 24"x 36" x40"
  • I used no plans, just built it from what I thought
A trip to the big box store for:
  • Plywood
  • Wheels
  • Aluminum duct work (this will conduct heat out of the smoke)
  • An assortment of 2x2's, 2x4's, 1x2's 1x3's
  • Unfinished pine tongue and groove paneling
  • Hardware - handles, latches. etc...

DAY 1
The first step was to put the wheels on the base.


Next, add some 2x4's to make a shallow box. Notice I left room for 2x2 uprights in the corners.


Add the uprights, and braces for the shelf which will form the bottom of the smoke chamber. 


Here is the bottom in place, as well as the rest of the basic box framed up. Notice I did put a pitch on it so the roof will drain.


DAY 2
Next, I added framing for the door. I also added supports for the rack using 1x2's with notches to hold rebar supports and metal shelf. The rebar and the shelf are removeable. I needed to be sure I could get them through the door opening.


I added some 2x4 bracing to attach rod supports (for a closet) to be able hang food items. The bracing will also give me something more to attach the paneling to.


With that, it was time to start "skinning" the smoker with the tongue & groove pine. Each part was cut to measure to ensure a tight fit. This was so far the most time consuming part of the project.

Here the sides are done.


At this point the battery on my nailer died so while it recharged, I messed around with the smoke delivery system. I used "real" duct tape to attach an elbow on this roof flange which will sit over the fire box.


My initial plan was to use flexible aluminum duct work to route the smoke, It proved too fragile. I'll have to rethink it.


Here you can see that I left the bottom of the back open to allow easy access to the smoke routing system. A little trim work makes it more attractive and finished looking.


Next I made the door and put the paneling on the front of the shack. The paneling is very thin and fragile so I needed to brace it to make it more rigid.


Here we are with the door installed. I added latches to keep it shut was well as a nice handle. Looks like an outhouse! Notice the shot with the door open, the door overlaps the door frame, hopefully creating a seal.


I put in about 10 hours on Day 2. (I'll be doing penance in honey-do's).

What's left?
  • Roof
  • Smoke stack installation
  • Rebuilding the smoke delivery system
  • Thermometer installation
  • Test run
  • BACON!
Until next time, Eat Well & Keep Digging!


The Gastronomic Gardener
Garden blog http://amidwestgarden.blogspot.com/
Cooking blog http://ihopeyouarehungry.blogspot.com/
Twitter - www.twitter.com/DavidPOffutt
http://www.facebook.com/TheGastronomicGardener

Thursday, November 25, 2010

Festive Penguins

These whimsical appetizers are easy to make and are sure to be a hit! While they take a little time, they are not difficult and everyone, especially children, seem to love them.

Ingredients:
Carrot
Black olives
Cream or Neufchatel Cheese softened
Garlic  Powder


Peel and halve the carrot. Cut into half disks


Cut a small triangle out of the half disks. Now you have feet and beaks!


Using kitchen shears, cut a V shaped notch out of half of the olives.


Season the cheese with a little garlic powder, mix well and spoon into a small plastic bag. Snip off a little piece in the corner of the bag to make a quick piping bag.
Pipe the mixture into the cut slit in one olive, and into the hole of one you left whole. Add a small triangle into the hole to make the beak. Use a toothpick to thread the head onto the body and onto the carrot "feet."


Continue until you are out of olives. 


Enjoy!
Until next time, Eat Well & Keep Digging!

The Gastronomic Gardener
Garden blog http://amidwestgarden.blogspot.com/
Cooking blog http://ihopeyouarehungry.blogspot.com/
Twitter - www.twitter.com/DavidPOffutt
http://www.facebook.com/TheGastronomicGardener
Related Posts Plugin for WordPress, Blogger...