Monday, February 28, 2011

Meatless Monday - Vegetarian Chili with Bulgar


For those of you following along, you know I like bulgar. This vegetarian chili is a perfect use of it as a filler and textural component.  The bulgar provides fiber and has similar mouth feel to ground meat.

I often find vegetarian recipes are light and bright, which I enjoy, but a hot and spicy chili demands a low note, a bass line to follow so to speak, that normally comes from animal fat. With that in mind I've included unsweetened baking cocoa. It does it's job and is definately a background note that you may not be able to place unless told.

I was also happy to use some of the tomato products I put up last summer. It's a satisfying feeling.

As always, this recipe is very flexible, feel free to add shredded carrots, mushrooms, corn, lentils, whatever you like.

Ingredients:
1 cup bulgar
2 onions chopped
2 green bell peppers chopped
1 jalapeno seeded - small dice
3  cloves of garlic minced
2 15 oz cans kidney beans drained and rinsed
16 oz tomato sauce
16 oz whole peeled tomatoes with their juice
1 15 oz can of "chili ready" tomatoes (if you don't have this product you'll want to use more cumin)
1 chipotle pepper plus 2 tbs of adobo sauce
1 tbs oil
1 tsp hot chili powder
1 tbs cocoa (unsweetened)
1 tsp ground cumin
1 tsp salt
salt and pepper to taste


Directions:
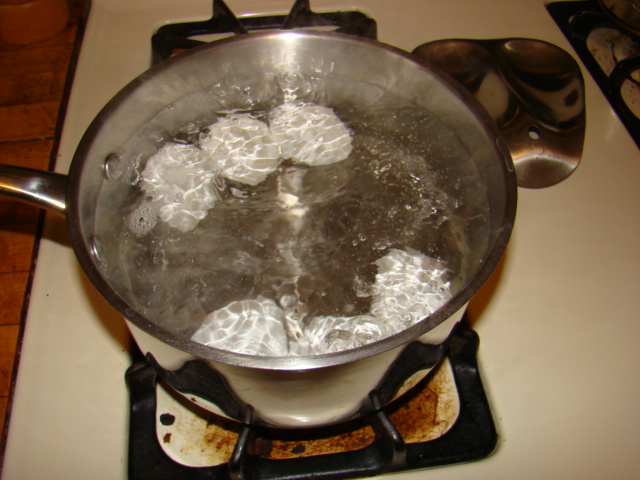
Put bulgar in a bowl, add hot water to cover, cover bowl and set aside for at least 15 minutes

Break down the vegtables.


Add 1 tbs oil to large pot over medium heat.

Add onions, peppers, garlic and salt to the oil.

Cook stirring often until the vegetables are soft, about 5 minutes. What's the yellow? Good catch! It's a bit of yellow pepper I had left over in the crisper. Use it up!


Add all three canned tomatoes, diced, sauce, and whole.

Add the chipotle and adobo sauce.

Stir and simmer for 5 minutes. Reduce heat to medium low.

Add beans and bulgar.


Stir, add cocoa, and chili powder.


Stir, reduce heat to low and simmer for 30 minutes.

Taste a sample. Adjust seasonings to your liking.

Simmer 5 more minutes.

Serve with corn bread, top with your favorite topping(s).


Hard to believe that it's meat free!

Until next time, Eat Well & Keep Digging.


The Gastronomic Gardener
Garden blog http://amidwestgarden.blogspot.com/
Cooking blog http://ihopeyouarehungry.blogspot.com/
Twitter - www.twitter.com/DavidPOffutt
http://www.facebook.com/TheGastronomicGardener

Sunday, February 27, 2011

Roasted Butternut Squash with Tagliatelle


I've got an acorn squash that we harvested back in September whose time has come.  I like roasted butternut squash and I like pasta.  I figure I'll combine the two.

Ingredients:
1 medium butternut squash, peeled, seeded and cubed - about 3 cups
1 & 1/2 tbs olive oil (put it in a small bowl you won't use it all at once)
1 tbs brown sugar
1/2 tsp salt
1/4 tsp white pepper
8 oz thinly sliced red onion (about 1 medium)
3/4 tsp dried rubbed sage (or 1 tbs fresh minced, or a chiffonade might be nice)
1 oz grated fresh Parmesan - about a 1/4 cup
4 oz uncooked tagliatelle or linguine or pappardelle

Directions:
Preheat oven to 450F

Put squash, brown sugar, 2.5 tsp of olive oil, salt, pepper, and red onions on a cookie sheet with sides.


Toss together well.


Bake in oven  about 25 minutes or until tender. Remove from oven Sprinkle with sage and combine.

While squash roasts in the oven, cook pasta acoording to the package directions . Drain, put in bowl, Toss with remaining oil.

Plate and top with  roasted squash mixture. Sprinkle with grated Parmesan


Until Next Time, Eat Well & Keep Digging!


The Gastronomic Gardener
Garden blog http://amidwestgarden.blogspot.com/
Cooking blog http://ihopeyouarehungry.blogspot.com/
Twitter - www.twitter.com/DavidPOffutt
http://www.facebook.com/TheGastronomicGardener

Saturday, February 26, 2011

Scotch Eggs


Scotch eggs have been around a long time. This wiki article goes into the history. I've had them warm and at room temp, they are a fine finger food when enjoying your favorite adult beverage or just as a snack.

They start with a good hard boiled eggs. You may know this but stay with me. Older eggs make the best hard boiled eggs, something about the change in PH makes them easier to peel. Cook them only enough to set the yolks and avoid the green tinge that sometimes coats the yolk.

Ingredients
6  hard boiled eggs
1or 2 eggs lightly beaten for coating
flour
salt for the water
12 oz loose sausage - I'm using the Yankee Sage Sausage I made the other day.
Bread Crumbs - make your own or boxed is OK too, I'm using Panko bread crumbs because I like the texture


Directions:
Place eggs in a pan of cold water.

Add a generous pinch of salt.


Bring to a boil.


Once water boils, remove from heat and cover.


Let stand 13 minutes.

Cool eggs rapidly in cold water (or ice bath)


Start oil to fry

When eggs are cooled, peel and dredge in flour, tapping off the excess.


Wrap in a layer of the raw loose sausage.

Dip in raw egg to coat.

Roll in bread crumbs.

Fry eggs in 350F oil for 10 minutes.


Drain on paper towels. Let cool to room temperature. Cut in half or quarters and serve.


A couple of final thoughts. Use medium or small eggs. These are really big once you wrap them in sausage. You may want to start with more sausage to be sure to cover them all. Next time I'll likely break out the deep fryer. They could also be baked which I might also try.  In any event, they are delicious!

Until next time, Eat Well & Keep Digging!


The Gastronomic Gardener
Garden blog http://amidwestgarden.blogspot.com/
Cooking blog http://ihopeyouarehungry.blogspot.com/
Twitter - www.twitter.com/DavidPOffutt
http://www.facebook.com/TheGastronomicGardener

Friday, February 25, 2011

Porky Split Pea soup


 A quick dinner on a weeknight. Savory bacon and Canadian bacon make this a filling soup.

Ingredients:
1 lb dried split peas
3 oz bacon ends (or 3-4 slices of thick cut bacon)
Carrots
Celery
1/2 medium onion
6 oz ham (I used Canadian bacon, if you have a ham bone, by all mean use it!)
6- 8 cups hot water


Slice the vegetables - a mandolin makes short work of them. Chop the bacon ends.


Chop the canadian bacon or the ham.


Start the bacon.


When the bacon has rendered fat, add the vegetables.


Add the peas, the water and the Canadian bacon (or ham).


Bring to a boil, reduce heat and simmer for about 45 minutes or until peas are tender.

Do you have an immersion blender? Now is the time to use it. Or a blender. If you use a blender, blend soup a little at a time.

A little stir of plain yogurt, a splash of vinegar. Dinner is served.


Until next time, Eat Well and Keep Digging!


The Gastronomic Gardener
Garden blog http://amidwestgarden.blogspot.com/
Cooking blog http://ihopeyouarehungry.blogspot.com/
Twitter - www.twitter.com/DavidPOffutt

Wednesday, February 23, 2011

Yankee Sage Sausage

Straight from Bruce Aidells book

Ingredients:

3 pounds pork butt
1/2 to 3/4 pound pork back fat
3 tablespoons finely chopped or dried and crumbled fresh sage, or 2 to 3 teaspoons ground sage
3 1/2 teaspoons kosher salt
1 tablespoon coarsely ground black pepper
1/4 teaspoon ground cayenne pepper
1/4 teaspoon dried summer savory (I left this out)
1/4 teaspoon dried marjoram
1/4 teaspoon dried thyme
1/8 teaspoon ground ginger
Pinch of ground cloves
1/4 cup water
Sheep of medium hog casings (optional)


Grind the meat and fat through a 1/4-inch plate.


 In a large bowl, mix the meat, fat, salt, sage, black pepper, cayenne, summer savory, marjoram, thyme, ginger, and cloves with the cold water. Knead and squeeze the mixture until thoroughly blended.

A little taste test. It was good, but will get better, the seasoning needs more time to meld with the meat and fat.


I formed 3 oz patties and set them between sheets of parchment paper.


Into the freezer!


Until next time, Eat Well & Keep Digging!


The Gastronomic Gardener
Garden blog http://amidwestgarden.blogspot.com/
Cooking blog http://ihopeyouarehungry.blogspot.com/
Twitter - www.twitter.com/DavidPOffutt
http://www.facebook.com/TheGastronomicGardener

Tuesday, February 22, 2011

Cowboy Candy - Sweet pickled Jalapenos


I saw this recipe over at http://www.foodiewithfamily.com/. The site over there is fantastic, please go check out her witty postings and fantastic food!  What a great idea, I have to try it!  It's been months since I broke out the canning equipment, but I have to for this...

These instructions come from  this page: http://www.foodiewithfamily.com/blog/2010/05/23/candied-jalapenos-cowboy-candy/.  Additional comments in Italics are mine

So lets make them!

Yield: About 9 half-pint jars of Candied Jalapenos plus additional jalapeno syrup. (I got 3 pints plus 1 pint of syrup)


Ingredients:
3 pounds fresh, firm, jalapeno peppers, washed
2 cups cider vinegar
6 cups white granulated sugar
1/2 teaspoon turmeric
1/2 teaspoon celery seed  (I substituted mustard)
3 teaspoons granulated garlic
1 teaspoon ground cayenne pepper


Wearing gloves, slice the peppers into uniform 1/8-1/4 inch rounds (using a mandolin made this process much faster than a knife and all the slices are consistant). Set aside.


In a large pot, bring cider vinegar, white sugar, turmeric, mustard seed, granulated garlic and cayenne pepper to a boil. Reduce heat and simmer for 5 minutes.


Add the pepper slices and simmer for exactly 4 minutes.


Use a slotted spoon to transfer the peppers, loading into clean, sterile canning jars to within 1/4 inch of the upper rim of the jar.


Turn heat up under the pot with the syrup and bring to a full rolling boil. Boil hard for 6 minutes.


Use a ladle to pour the boiling syrup into the jars over the jalapeno slices. Insert a cooking chopstick or the canning tool to the bottom of the jar two or three times to release any trapped pockets of air. Adjust the level of the syrup if necessary. Wipe the rims of the jars with a clean, damp paper towel and fix on new, two-piece lids to finger-tip tightness.

*If you have leftover syrup, and it is likely that you will, you may can it in half-pint or pint jars, too. It’s wonderful brushed on meat on the grill or added to potato salad or, or, or… In short, don’t toss it out!

Place jars in a canner, cover with water by 2-inches. Bring the water to a full rolling boil. When it reaches a full rolling boil, set the timer for 10 minutes for half-pints or 15 minutes for pints. When timer goes off, use canning tongs to transfer the jars to a cooling rack. Leave them to cool, undisturbed, for 24 hours. When fully cooled, wipe them with a clean, damp washcloth then label.


Store for at least 2 weeks, preferably 4 before using.

Thanks again http://www.foodiewithfamily.com/ for this fabulous recipe.

Until next time, Eat Well & Keep digging!
The Gastronomic Gardener
Garden blog http://amidwestgarden.blogspot.com/
Cooking blog http://ihopeyouarehungry.blogspot.com/
Twitter - www.twitter.com/DavidPOffutt
http://www.facebook.com/TheGastronomicGardener

Monday, February 21, 2011

Meatless Monday - Falafel

This is an easy Meatless Monday dish. Falafel is a convenient to make ahead and have ready to fry up.
It was a filling meal, and meat free.


The key is to use chickpeas that have not been cooked, only soaked.
Ingredients:

1 3/4 cup dried chickpeas
1 cup chopped parsley
2 cloves garlic, lightly crushed
1 small onion, quartered
1 tsp ground coriander
2 tsp ground cumin
1 tsp salt
1/2 tsp black pepper
1/2 tsp baking soda
1 tbs lemon juice
Pinch cayenne, or to taste
Oil, for frying (I used peanut)


Directions:
Put the beans in a large bowl and cover with water by 3 or 4 inches; they will triple in volume. Soak for overnight hours, adding water if needed to keep beans submerged.

Drain beans well (reserve soaking water) and transfer to a food processor. Process until grainy and no whole peas remain.

Add the rest of the ingredients except oil;


process until minced but not pureed, scraping sides of bowl down; add a  little soaking water if necessary (it wasn't), the parsely seemed to give it enough moisture.

It smells amazing!


Cover and place in  refrigerator until ready to fry. It is important to let it chill in order to tighten up a little.

Put the oil in a large, deep saucepan to a depth of at least 2 inches; more is better.

Turn heat to medium-high and heat oil to about 350 degrees (a pinch of batter will sizzle immediately).

Scoop heaping tablespoons of batter and shape into balls or small patties. Fry in batches, without crowding, until nicely browned, turning as necessary; total cooking time will be less than 5 minutes.
Remove cooked falafel to paper towel covered plate


Serve hot or at room temperature with Pita, Tzatziki, Lebneh.

Crunchy outside, tender and savory inside.


Until next time, Eat Well & Keep Digging!


The Gastronomic Gardener
Garden blog http://amidwestgarden.blogspot.com/
Cooking blog http://ihopeyouarehungry.blogspot.com/
Twitter - www.twitter.com/DavidPOffutt
http://www.facebook.com/TheGastronomicGardener

Orange Almond Cake


This is the second of the two desserts for the team at work. Just now struck me - how the heck am I going to get them to the train, off the train, and over to the Willis ( formerly Sears) Tower without becoming some comedic catastrophe?

Ah well, let's get to it. I've not made this cake since 2003.  Adapted from a Williams - Sonoma recipe that originally was in their catalogue

For the cake:
3/4 cup all purpose flour
3/4 cup almond paste
3/4 cup  granulated sugar
12 tbs butter (1 1/2 sticks)
3 eggs lightly beaten
1/2 tsp baking powder
1/8 tsp salt
1/2 tsp orange extract
Zest of one orange


Directions:
Have ingredients at room temperature

Put rack in lower third of oven, preheat to 325F

Grease and flour baking pan

Sift together flour, baking powder, and salt

In the bowl of an electric mixer fitted with flat beater, beat almond paste on a low speed until small crumb forms - about a minute


Gradually beat in sugar

Beat in butter 1tbs at a time

Increase speed to medium, beat until fluffy, about 3 minutes


Gradually add eggs, beating well between additions


Beat in orange extract and zest

Reduce speed to low, add flour mixture

Spoon batter into pan, level it out


Bake  for 35 minutes, before checking for doneness. This went for 45 minutes.


Cake is done when toothpick inserted into cake comes out clean.

Transfer to a wire rack and cool for 10 minutes, invert onto cake round and cool completely


Sprinkle with powdered sugar, watch the  colleagues ooh and ahh!


Until next time, Eat Well and Keep Digging!

The Gastronomic Gardener
Garden blog http://amidwestgarden.blogspot.com/
Cooking blog http://ihopeyouarehungry.blogspot.com/
Twitter - www.twitter.com/DavidPOffutt
http://www.facebook.com/TheGastronomicGardener
Related Posts Plugin for WordPress, Blogger...